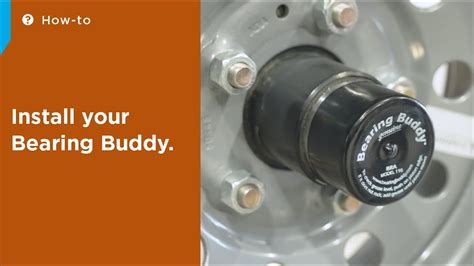
An In-Depth Guide: Installing Bearing Buddies for Optimal Trailer Maintenance
Introduction
Bearing buddies are invaluable tools for trailer owners, extending the lifespan of trailer bearings by preventing water and contaminants from entering. This comprehensive guide will guide you through the step-by-step process of installing bearing buddies on your trailer, ensuring optimal trailer performance and minimizing maintenance costs.
Why Install Bearing Buddies?
According to the National Trailer Manufacturers Association, over 80% of trailer bearing failures are caused by water and contamination. Bearing buddies combat these issues by sealing the bearings, preventing costly repairs and downtime.
Benefits of Bearing Buddies:
-
Extended bearing life: Bearing buddies significantly prolong the lifespan of trailer bearings by excluding water and contaminants.
-
Reduced maintenance costs: By preventing premature bearing failure, bearing buddies minimize maintenance expenses, saving you time and money.
-
Improved trailer safety: Properly lubricated bearings reduce friction and heat, minimizing the risk of axle and wheel malfunctions.
-
Enhanced trailer performance: Well-maintained bearings ensure smooth and efficient trailer operation, optimizing fuel efficiency and handling.
Effective Strategies for Successful Installation
-
Prepare your trailer: Clean the wheel bearings and axle hub to ensure a proper seal.
-
Select the right size: Determine the correct bearing buddy size for your trailer's bearings.
-
Use high-quality materials: Invest in durable bearing buddies made from corrosion-resistant materials.
-
Follow instructions carefully: Adhere to the manufacturer's guidelines for proper installation.
Common Mistakes to Avoid
-
Overfilling the bearing buddy: Excess grease can pressurize the bearing buddy, causing it to burst.
-
Using the wrong type of grease: Use bearing buddy-specific grease to ensure compatibility and effectiveness.
-
Forgetting to repack bearings: Regular repacking of bearings is essential for optimal performance and longevity.
A Step-by-Step Approach to Installing Bearing Buddies
Materials Required:
- Bearing buddies (two per wheel)
- Bearing buddy grease
- Wheel bearing packer
- Torque wrench
- Safety glasses
Steps:
-
Remove the trailer wheel: Use a lug wrench to loosen and remove the wheel nuts.
-
Clean the bearings and hub: Use a brake cleaner and brush to remove dirt, grease, and debris from the bearings and axle hub.
-
Pack the bearings: Fill a wheel bearing packer with bearing buddy grease and pump the grease evenly into the bearings.
-
Install the bearing buddies: Apply a thin layer of grease to the inside of the bearing buddy seals and slide them onto the axle hub.
-
Tighten the bearing buddy: Use a torque wrench to tighten the bearing buddy until the specified torque is reached.
-
Install the wheel: Reattach the wheel to the axle hub and tighten the lug nuts using a torque wrench.
-
Lubricate the bearing buddy: Fill the bearing buddy with grease using a grease gun and a needle adapter.
Safety Precautions:
- Wear safety glasses when handling grease and metal parts.
- Be aware of sharp metal edges and handle components with care.
- Ensure the trailer is parked on a level surface and securely chocked.
Humorous Tales to Highlight the Importance of Bearing Buddies
-
The Loose Bearing: A trailer owner neglected to install bearing buddies, resulting in damaged bearings and a wheel coming loose on the highway. The trailer swerved violently, nearly causing an accident. Lesson learned: Invest in bearing buddies for trailer safety.
-
The Grease Geyser: An enthusiast overfilled their bearing buddies, resulting in an explosion of grease that covered their trailer and the nearby surroundings. Lesson learned: Follow manufacturer instructions and avoid overfilling.
-
The Forgotten Repack: A boater neglected to repack their trailer bearings before a long trip. The bearings seized up, causing the trailer to break an axle and end the trip prematurely. Lesson learned: Regular repacking of bearings is crucial for trailer longevity.
Tables for Reference
Bearing Buddy Sizes and Compatibility
| Trailer Axle Diameter (inches) |
Bearing Buddy Size |
| 1-1/16 to 1-1/8 |
15-16 |
| 1-1/4 |
15-17 |
| 1-5/16 |
15-19 |
| 1-3/8 |
15-23 |
| 1-7/16 |
15-27 |
Bearing Buddy Maintenance Schedule
| Maintenance Task |
Frequency |
| Grease bearings |
Annually or as per manufacturer instructions |
| Inspect bearing buddies |
Every 2,500 miles or as per manufacturer instructions |
| Repack bearings |
Every 10,000 miles or as per manufacturer instructions |
Common Bearing Buddy Problems and Solutions
| Problem |
Possible Cause |
Solution |
| Leaking bearing buddy |
Damaged seal, overfilled, wrong grease |
Inspect seal, replace if damaged, avoid overfilling, use correct grease |
| Hard to turn bearing buddy cap |
Rust, corrosion, overtightened |
Clean and lubricate cap, use penetrating oil if necessary, torque to specifications |
| Bearing buddy cap burst |
Overfilled, wrong grease |
Drain excess grease, replace cap, use correct grease |
Conclusion
Installing bearing buddies on your trailer is a worthwhile endeavor that can extend the life of your bearings, reduce maintenance costs, and enhance trailer safety. By following the step-by-step instructions provided in this guide, you can ensure a successful installation and reap the benefits of well-maintained bearings. Remember, proper installation and regular maintenance are key to maximizing the effectiveness of bearing buddies and optimizing trailer performance.


