Cotter Pins 101: A Comprehensive Guide to Their Function, Uses, and Best Practices
What are Cotter Pins?
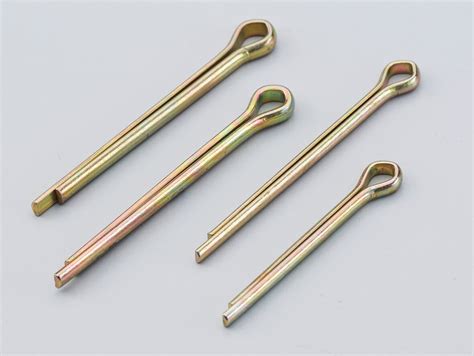
Cotter pins, also known as split pins, are simple yet effective fastening devices used to prevent bolts, nuts, and other components from working loose under the influence of vibration, shock, or other external forces. They consist of a cylindrical shaft with a split running lengthwise and a radial arm that protrudes at a 90-degree angle from the shaft.
Types of Cotter Pins
Cotter pins come in various sizes and materials to suit different applications. The most common types include:
-
Standard Cotter Pin: The most common type, with a pointed arm for easy insertion and a standard head size.
-
Heavy Duty Cotter Pin: Designed for higher load-bearing applications, with a thicker shaft and oversized head.
-
T-Head Cotter Pin: Features a T-shaped head that provides additional gripping surface.
-
Spring Cotter Pin: Made from spring steel, designed to provide tension and prevent self-loosening.
-
Machine Cotter Pin: Specifically designed for use with machines and has a reduced head size for tight spaces.
Materials Used
Cotter pins can be made from various materials, including:
-
Steel: Common for general applications and provides good strength and durability.
-
Stainless Steel: Resistant to corrosion and suitable for marine or outdoor environments.
-
Brass: Non-magnetic and often used in electrical applications.
-
Aluminum: Lightweight and strong, ideal for aerospace and automotive applications.
Dimensions and Specifications
Cotter pins are available in a wide range of dimensions, typically specified by:
-
Diameter: Measured across the shaft, ranging from 1/32 inch to 1/2 inch.
-
Length: Measured from the split end to the outer edge of the head, ranging from 1/2 inch to 6 inches.
-
Head Size: The diameter of the head, which varies based on the type of cotter pin.
Installation and Removal
Installing and removing cotter pins is relatively simple:
Installation:
- Insert the split end of the cotter pin through the hole in the bolt or component.
- Bend one leg of the cotter pin over the bolt head or nut.
- Bend the other leg over the first leg, creating a tight "W" shape.
Removal:

- Use a cotter pin extractor or needle-nose pliers.
- Straighten out one of the legs of the cotter pin.
- Pull the straightened leg out of the hole.
Applications
Cotter pins are highly versatile and can be used in various applications, including:
- Securing threaded fasteners in automotive, marine, and industrial equipment
- Locking cotter pins in firearms
- Assembling and disassembling machinery and equipment
- Creating temporary connections or hinges
- Preventing components from moving or rotating unintentionally
Advantages of Using Cotter Pins
-
Low Cost: Cotter pins are inexpensive to purchase and maintain.
-
Ease of Installation: They are easy to install and remove, requiring minimal tools or skills.
-
Positive Locking: They provide a positive lock that prevents components from loosening due to vibration or shock.
-
Versatility: Suitable for a wide range of applications and available in various sizes and materials.
Disadvantages of Using Cotter Pins
-
Material Weakness: Cotter pins can be made of soft materials, making them susceptible to bending or breakage under high loads.
-
Limited Strength: Not suitable for applications requiring high tensile strength.
-
Potential for Shearing: When not properly installed, cotter pins can shear off under excessive force.
Common Mistakes to Avoid
-
Using the Wrong Size: Select the appropriate size cotter pin based on the diameter of the bolt or hole.
-
Overbending: Avoid excessively bending the cotter pin legs, as it can weaken and break them.
-
Non-Positive Locking: Ensure that the cotter pin legs are securely bent around each other to create a positive lock.
-
Ignoring Corrosion: Regularly inspect cotter pins for corrosion and replace them if necessary, especially in harsh environments.
-
Improper Removal: Use proper tools to avoid damaging the cotter pin or bolt during removal.
Table 1: Cotter Pin Dimensions and Tolerances
| Diameter (inch) |
Length (inch) |
Head Size (inch) |
Tolerance |
| 1/32 |
1/2 - 2 |
3/16 - 1/4 |
+/-0.002 |
| 1/16 |
1/2 - 3 |
3/16 - 5/16 |
+/-0.003 |
| 3/32 |
1 - 4 |
1/4 - 3/8 |
+/-0.004 |
| 1/8 |
1-1/2 - 5 |
5/16 - 7/16 |
+/-0.005 |
| 5/32 |
2 - 6 |
3/8 - 1/2 |
+/-0.006 |
Table 2: Cotter Pin Materials and Properties
| Material |
Tensile Strength (psi) |
Corrosion Resistance |
Applications |
| Steel |
120,000 - 150,000 |
Fair |
General purpose |
| Stainless Steel |
160,000 - 180,000 |
Excellent |
Marine, outdoor environments |
| Brass |
50,000 - 70,000 |
Good |
Electrical, non-magnetic applications |
| Aluminum |
40,000 - 60,000 |
Poor |
Aerospace, automotive |
Table 3: Cotter Pin Installation Guidelines
| Bolt Diameter (inch) |
Cotter Pin Diameter (inch) |
Cotter Pin Length (inch) |
| Up to 1/4 |
1/32 - 1/16 |
1/2 - 1-1/2 |
| 5/16 - 1/2 |
3/32 - 1/8 |
1-1/2 - 2 |
| 9/16 - 3/4 |
1/8 - 5/32 |
2 - 2-1/2 |
| 7/8 - 1 |
5/32 - 3/16 |
2-1/2 - 3 |
| Over 1 |
7/32 - 1/4 |
3 - 4 |
Effective Strategies for Using Cotter Pins
-
Proper Selection: Choose the correct size and material for the application.
-
Tight Fit: Ensure a snug fit between the cotter pin and the hole to prevent movement.
-
Positive Locking: Create a secure "W" shape with the cotter pin legs to provide a positive lock.
-
Inspection and Maintenance: Regularly inspect and replace cotter pins as necessary to ensure proper function.
-
Redundancy: Consider using multiple cotter pins for critical applications to enhance reliability.
Call to Action
Cotter pins are simple yet essential fasteners that provide reliable and cost-effective solutions for preventing component loosening. By understanding their different types, applications, and best practices, you can effectively use cotter pins in various industries and projects. Remember to choose the right cotter pin for the job, install it properly, and maintain it regularly to ensure the optimal performance of your equipment and systems.
