The Essential Guide to Cotters and Cotter Pins: Unlocking Secure Connections
Introduction
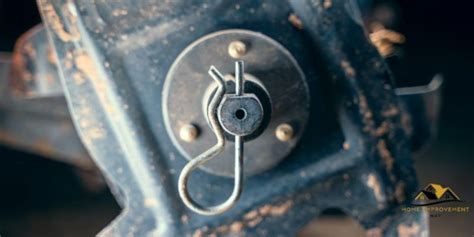
In the world of engineering, reliable and secure connections are paramount. Among the various solutions available, cotters and cotter pins stand out as versatile and effective means of fastening components together. Cotters, also known as taper pins, are solid cylindrical pieces that fit into matching holes to prevent axial movement, while cotter pins are split pins that pass through holes in a cotter and a shaft, creating a secure connection.
This comprehensive guide will delve into the intricacies of cotters and cotter pins, exploring their applications, advantages, and best practices. Whether you're a seasoned engineer or a curious DIY enthusiast, this article will empower you with the knowledge to utilize these indispensable fastening elements confidently.
Chapter 1: Types and Applications of Cotters
1.1 Types of Cotters
Cotters come in various types, each designed for specific applications:

-
Conical Cotters: Also known as tapered cotters, these have a conical shape with a slight taper along their length, allowing for a snug fit in matching holes.
-
Cylindrical Cotters: As the name suggests, these are cylindrical in shape and do not have a taper. They are used when a parallel fit is required.
-
Split Cotters: Also called parallel cotters, these are split along their length, allowing them to be inserted into holes without having to remove any components.
-
Gib-Head Cotters: These have a head on one end that protrudes from the hole, providing a convenient grip for installation and removal.
1.2 Applications of Cotters
Cotters are used in a wide range of applications, including:
- Connecting rods and shafts
- Securing pulleys and gears
- Fastening parts of machinery
- Preventing axial movement in hydraulic cylinders
Chapter 2: Types and Advantages of Cotter Pins
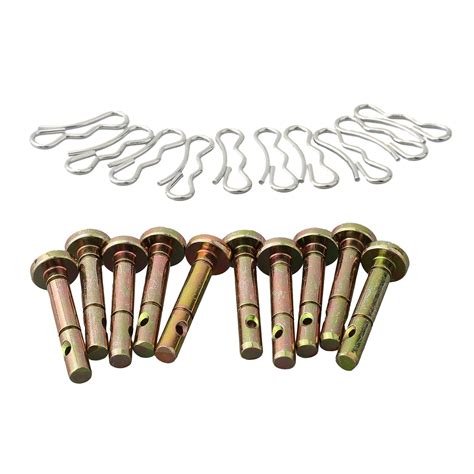
2.1 Types of Cotter Pins
Cotter pins come in two main types:
-
Single-Cotyledon Pins: These have a single, flat leaf on one end and are used to secure cotters or other components in place.
-
Double-Cotyledon Pins: These have two prongs on one end, which are spread out after insertion to provide a secure grip.
2.2 Advantages of Cotter Pins
Cotter pins offer several advantages:
-
Secure Connections: When properly installed, cotter pins effectively prevent axial movement, ensuring a reliable connection.
-
Easy Installation: Cotter pins are quick and easy to install, requiring minimal tools.
-
Low Cost: Compared to other fastening methods, cotter pins are cost-effective and readily available.
-
Reusable: Cotter pins can be removed and reused multiple times, making them a sustainable option.
Chapter 3: Installation and Removal of Cotters and Cotter Pins
3.1 Installing Cotters
- Select a cotter with the appropriate diameter and length for the hole size.
- Insert the cotter into the hole and tap it gently into place using a hammer.
- Ensure the cotter is fully seated and flush with the surface.
3.2 Installing Cotter Pins
- Choose a cotter pin with a length that is at least twice the diameter of the hole.
- Bend one end of the cotter pin into a 90-degree angle using pliers.
- Insert the bent end of the cotter pin through the hole and spread the prongs on the other end.
- Bend the prongs back to secure the pin in place.
3.3 Removing Cotters and Cotter Pins
-
Cotters: Use a punch or drift to drive the cotter out of the hole.
-
Cotter Pins: Cut the ends of the pin using pliers and remove the remaining portion with a drift.
Chapter 4: Effective Strategies for Using Cotters and Cotter Pins
4.1 Proper Hole Preparation
- Ensure the holes are clean and free of any obstructions or burrs.
- Use a drill bit of the correct size to match the cotter or cotter pin.
- Chamfer the edges of the holes to facilitate easy insertion.
4.2 Choosing the Right Material
- Consider the application requirements when selecting the material for cotters and cotter pins.
- Steel, stainless steel, and brass are common choices, each with its own advantages.
4.3 Proper Alignment
- Ensure the cotter or cotter pin is properly aligned with the holes before installation.
- Use a drift or punch to adjust the position as needed.
Chapter 5: Tips and Tricks for Successful Installations
-
Use a lubricant: Applying a thin layer of lubricant to the cotter or cotter pin before installation can reduce friction and ensure a smoother fit.
-
Secure the Cotter Head: For cotters with a gib-head, use a lock washer or nut to secure the head in place.
-
Check the Connection Regularly: Periodically inspect the cotter or cotter pin connection to ensure it remains secure and functioning properly.
Chapter 6: Common Mistakes to Avoid
-
Incorrect Hole Size: Using a cotter or cotter pin that is too small or too large for the hole will compromise the connection.
-
Misalignment: Failure to align the cotter or cotter pin properly can lead to binding or premature failure.
-
Improper Installation: Not fully inserting the cotter or not spreading the prongs of the cotter pin wide enough can result in a loose connection.
-
Overtightening: Excessive force applied to the cotter or cotter pin can damage the components or strip the threads.
Chapter 7: Pros and Cons of Cotters and Cotter Pins
7.1 Pros
-
Reliable and Secure Connections: Cotters and cotter pins provide secure connections that prevent axial movement.
-
Ease of Installation and Removal: They are quick and easy to install, even in confined spaces.
-
Low Cost: Cotters and cotter pins are affordable fastening solutions.
-
Reusable: Cotter pins can be removed and reused multiple times.
7.2 Cons
-
Specialized Knowledge Required: Proper installation requires some mechanical understanding.
-
Limited Load Capacity: Cotters and cotter pins have a lower load capacity compared to some other fastening methods.
-
Susceptible to Corrosion: Steel cotters and cotter pins are vulnerable to corrosion in moist environments.
Table 1: Material Comparison for Cotters and Cotter Pins
| Material |
Advantages |
Disadvantages |
| Steel |
High strength, durability, and wear resistance |
Susceptible to corrosion, magnetic |
| Stainless Steel |
Excellent corrosion resistance, high strength |
More expensive than steel, non-magnetic |
| Brass |
Non-magnetic, corrosion-resistant, easy to machine |
Softer than steel, lower strength |
Table 2: Cotter Types and Applications
| Cotter Type |
Application |
| Conical Cotters |
Connecting rods and shafts, securing pulleys and gears |
| Cylindrical Cotters |
Fastening parts of machinery, preventing axial movement in hydraulic cylinders |
| Split Cotters |
Securing cotters or other components in place |
| Gib-Head Cotters |
Applications where a protruding head is required for easy grip |
Table 3: Cotter Pin Types and Applications
| Cotter Pin Type |
Application |
| Single-Cotyledon Pins |
Securing cotters, retaining shafts |
| Double-Cotyledon Pins |
Applications requiring higher resistance to axial loads |
Conclusion
Cotters and cotter pins are essential fastening elements in various engineering applications, offering secure and reliable connections. Understanding their types, advantages, and best practices is crucial for successful and efficient utilization. By following the guidelines outlined in this comprehensive guide, you can confidently use cotters and cotter pins to enhance the performance and longevity of your projects. Remember, proper installation, regular maintenance, and a keen eye for detail will ensure that your connections remain strong and secure.
