The Ultimate Guide to Cotter Pins: Everything You Need to Know
Introduction
Cotter pins, also known as split pins, are simple yet essential fasteners used in various applications. They are widely employed in industries such as automotive, construction, machinery, and even DIY projects. This comprehensive guide will delve into every aspect of cotter pins, providing valuable information for engineers, technicians, and anyone interested in these versatile fasteners.
What is a Cotter Pin?
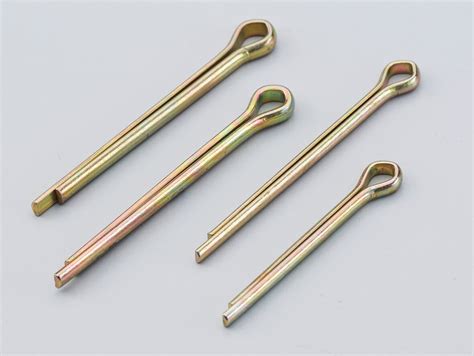
A cotter pin is a type of pin that is inserted through a hole in a shaft or bolt and bent to secure it in place. It consists of a head, body, and split ends that are bent outwards after insertion. The primary function of a cotter pin is to prevent nuts, bolts, or other parts from loosening or falling off due to vibration, movement, or stress.
Types of Cotter Pins
Cotter pins are available in a range of sizes and materials to suit different applications. The most common types include:
-
Plain Cotter Pins: The most basic type, made from steel or stainless steel, with plain ends that can be bent manually.
-
Formed Wire Cotter Pins: Manufactured from wire and shaped with a specific end configuration, such as a T-bend or S-bend.
-
Spring Cotter Pins: Designed with a coil or spring action to provide additional tension and secure the connection.
-
Self-Locking Cotter Pins: Feature a pre-formed hook or barb that locks into the hole after insertion, preventing it from becoming loose.
Materials and Finishes
Cotter pins are typically made from various materials, including:

-
Steel: Common for general-purpose applications, offering strength and durability.
-
Stainless Steel: Resistant to corrosion, making it suitable for outdoor or marine environments.
-
Bronze: Provides good corrosion resistance and low friction.
-
Aluminum: Lightweight and corrosion-resistant, suitable for aerospace and other weight-sensitive applications.
Finishes such as zinc plating, electroplating, or powder coating can be applied to cotter pins to enhance their corrosion resistance and aesthetics.
Sizes and Dimensions
Cotter pins are available in a wide range of sizes to accommodate different hole diameters and shaft sizes. The most common sizes are specified by their diameter and length, measured in inches or millimeters.

Applications
Cotter pins have a broad range of applications in various industries:
-
Automotive: Securing brake pads, brake drums, steering components, and more.
-
Construction: Holding truss rods, beams, and other structural elements in place.
-
Machinery: Securing gears, pulleys, levers, and other mechanical components.
-
DIY Projects: Attaching hinges, handles, and other hardware to wood or metal surfaces.
Advantages of Cotter Pins
-
Low Cost: Cotter pins are an inexpensive fastener option compared to other types of mechanical fasteners.
-
Easy to Install: They can be easily inserted and bent manually without the need for special tools.
-
Versatile: Can be used in a wide range of applications and with various materials.
-
Secure: When properly installed, cotter pins provide a reliable and secure connection.
-
Reusable: Cotter pins can be reused multiple times if not damaged or deformed.
Limitations of Cotter Pins
-
Not Suitable for Heavy Loads: Cotter pins are not recommended for applications involving heavy loads or high stress.
-
Can Weaken Over Time: Repeated bending and unbending can weaken the cotter pin, making it less effective.
-
Limited Hole Diameter: The hole diameter must be precise to ensure proper fit and functionality of the cotter pin.
Safety Precautions
When working with cotter pins, it is important to follow these safety precautions:
-
Wear Safety Glasses: Always wear safety glasses to protect your eyes from flying debris or metal splinters.
-
Use Proper Tools: Use pliers or other suitable tools to bend the ends of the cotter pin safely.
-
Avoid Overbending: Excessive bending can weaken the cotter pin and reduce its effectiveness.
-
Inspect Regularly: Periodically inspect cotter pins to ensure they are not damaged or loose.
How to Install a Cotter Pin
Installing a cotter pin is a straightforward process:
-
Insert: Push the cotter pin through the alignment hole in the shaft or bolt.
-
Bend the Ends: Bend the split ends of the cotter pin outwards using pliers or a hammer.
-
Position: Position the cotter pin so that the ends are perpendicular to the shaft or bolt.
-
Secure: Bend the ends of the cotter pin completely closed to secure the connection.
Stories and Lessons Learned
Story 1:
In a construction project, a crew was installing heavy beams using truss rods. They relied on cotter pins to secure the rods in place. However, they neglected to inspect the cotter pins regularly. Over time, the pins became weakened due to vibration and movement. One day, one of the pins failed, causing the beams to shift and collapse, resulting in severe damage.

Lesson Learned: Regular inspection and maintenance of cotter pins is crucial to prevent failures and ensure safety.
Story 2:
A mechanic was servicing a vehicle's brakes. He used cotter pins to secure the brake pads in place. However, he failed to bend the ends of the cotter pins properly. As a result, the pins worked loose during driving. The brake pads fell off, causing a loss of braking power and a potential accident.
Lesson Learned: Proper installation and bending of cotter pins is essential to ensure their effectiveness and safety.
Story 3:
A DIY enthusiast was assembling a piece of furniture using cotter pins to attach the hinges. He used the wrong size cotter pins, which resulted in a loose and unstable connection. The hinges kept coming off, preventing the furniture from functioning properly.
Lesson Learned: Selecting the correct size cotter pin is vital to ensure a secure and reliable connection.
Tips and Tricks
-
Use a Cottering Tool: A cottering tool can make the bending process easier and more precise.
-
Lubricate the Pin: Applying a small amount of lubricant to the cotter pin can reduce friction and facilitate insertion.
-
Create a Tab: If the split ends of the cotter pin are too short to bend, create a small tab by filing or snipping one of the ends.
-
Avoid Overtightening: Overtightening the cotter pin can weaken it and make it difficult to remove later.
-
Inspect for Damage: Always inspect cotter pins for damage or deformation before installation.
Conclusion
Cotter pins are indispensable fasteners that provide a simple and effective solution for securing various components in place. By understanding their types, applications, limitations, and proper installation techniques, engineers, technicians, and DIY enthusiasts can harness the power of these versatile fasteners. Remember to prioritize safety, inspect cotter
